Welcome to my car audio website. This page is dedicated to my passion for music. After about three years of seemingly never ending quest, I finally achieved what I've always wanted, Sonic Nirvana. What I've gathered here is more or less a compilation of my experiences in the hobby based on my humble setup. I hope you'll enjoy it.
Accessories Aura Dynamics 1.0 Farad Capacitor
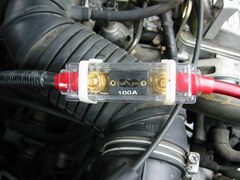
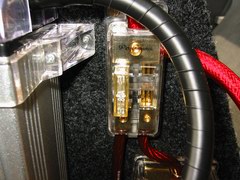
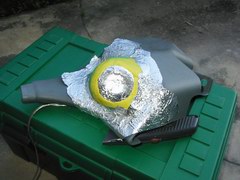
ANL Main Fuse (100A)
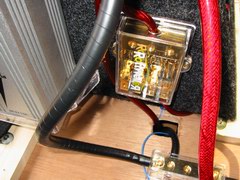
MAXI Distribution Block (80A x 2)
AGU Distribution Block (30A x 4)
Ground Distribution Block (4 outs)
2GA Power & Ground Wire
Sound Deadening Hiro Dampening Pads
Power Supply
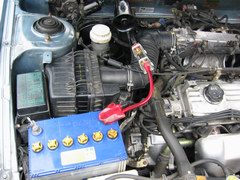
I wanted to make sure that all of my audio equipments get all the power they need to perform at their best. For my setup, I use 2 AWG wire for both power and ground wire. This size is large enough to handle a current demand of up to 150 amperes which is more than adequate for my current setup. I purposely chose this oversized wire to allow some room for possible future upgrades. An in-line ANL fuse rated 100A is placed just about 8" from the battery terminal. The fuse holder is securely tied using cable ties to make sure that the cover will not accidentally comes off leaving the terminals vulnerable to possible short circuit.
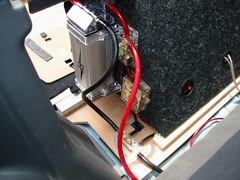
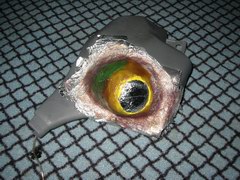
The power wire runs all the way to a MAXI fused distribution block located in the trunk. Only one 80A fuse used as shown in the picture. The output goes directly to my 4 channels McIntosh MCC404M amplifier. The right output goes to another fused distribution block for further division. The second distribution block uses AGU type fuse and was used in my previous setup. It's not in use anymore, but were left there just in case.
The leftmost picture above shows a 1.0 Farad stiffening capacitor mounted at the side of the subwoofer box. Adding the capacitor has improved the deep bass response of my system significantly. It also helps to avoid my headlamps from dimming when playing loud during night drives.
Wires and Interconnects
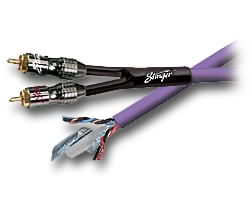
I use a Stinger Dream Series RCA cable for my frontstage signal, and a generic pair of RCA for my subwoofer signal. Using high quality cable will definitely give much more noticeable improvement in component speakers and not so much on subwoofer playing sub-bass frequencies. For you out there thinking of getting some expensive cables but wondering just how much improvements will be gained, honestly, there isn't much improvements. It's true that it makes a system sounds clearer and delivers more subtle details. But I believe that upgrading signal cable should be the last thing to do after everything else. More improvements will be gained by upgrading the speakers, amplifiers, head units, etc. As for the speaker wire, I use Rottweiler 14 AWG OFC wire.
Amp Rack
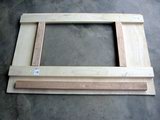
I am not a professional installer, nor a good carpenter. But the thought of building my own amprack sounds interesting. So I took the challenge of building my own amprack with the limited experience and the limited tools that I have. The results, although is nowhere near professional quality, is still very rewarding for me. The process is very time consuming and due to my lack of experience, took me quite a number of trips to the hardware stores due to unforeseen needs in certain materials. It has become a routine that in the middle of putting up something, I realized that I need some extra screws, etc. My suggestion for DIY newcomers out there, plan your work properly and write down your shopping list before you go to the store. This will save you a lot of time.
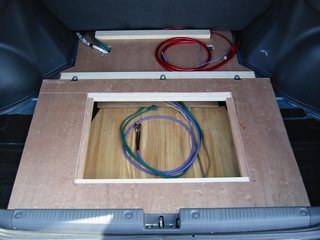
The first two images show the cover of the amprack, and the next two shows the base of the amprack where the amplifier will be mounted. The protruding wooden sticks are used to ensure that the rack will not move once it is in place. I also put some hardwood at the base of the amprack cover to ensure a strong support.
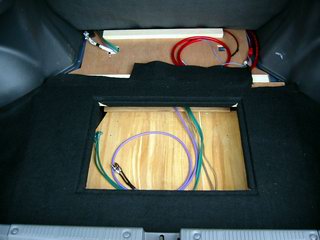
Here's how it looks like when the main structures are in place. The base of the amprack is placed in the tire well, and the cover is placed on top. All cables and wires are already in place and ready for connection. Then the cover is carpeted in black using hot melt glue. As you shall see later, the subwoofer box will be placed on top of the rack, also carpeted in black.
Kickpanels
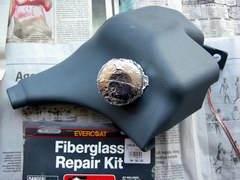
Here's how I build my tweeter mounting on the kickpanels. The first picture shows the right tweeter wrapped in aluminum foil for protection. I used modeling clay to create the shape of the mounting. There are other ways to accomplish this, but I prefer to use clay because it's cheap and easy to work with. The second picture shows the molded clay around the tweeter, ready to be fiberglassed. The last picture shows the fiberglassed panel. After the resin has been fully cured, it was removed and trimmed to fit. The whole fiberglassing job took me about 6 hours.
If you'd like to build your own fiberglass, I strongly recommend you to use fiberglass cloth instead of fiberglass mat. It's a little bit more expensive than the matted type, but much easier to work with.
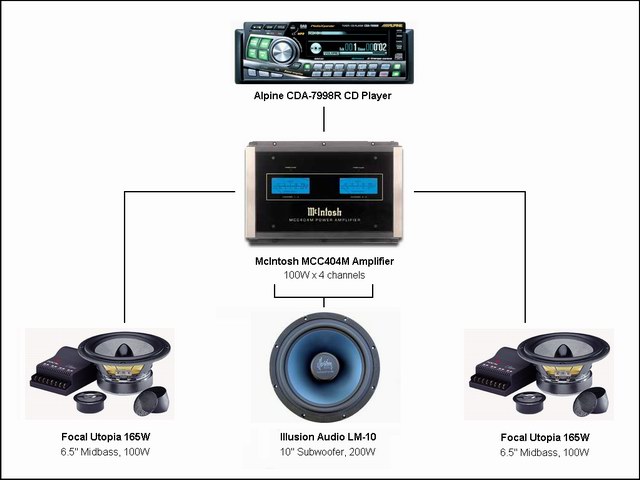
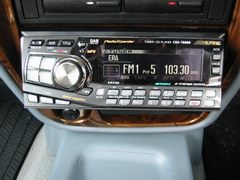
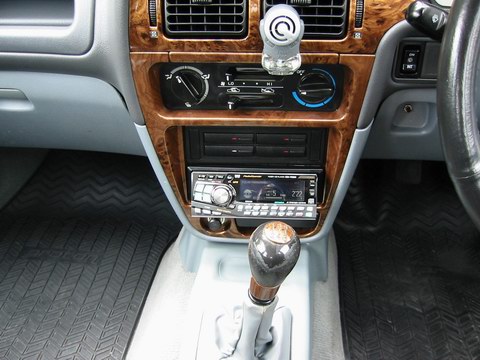
Alpine CDA-7998R CD Player
I wanted a head unit that produces clean output and has a digital time-alignment (TA) control. After looking at what was available, I chose this model from Alpine as my head unit. This was the top of the line model from Alpine before the F1 model was released. The player comes with a built-in crossover with adjustable center frequency in 1/3 octave increment and selectable slope from 6/12/18/24 dB/oct. It also allows level adjustment for the Front, Rear, and Subwoofer directly from the HU itself. The 5-band EQ is another nice feature. Instead of getting stuck with 13-band outboard EQ with limited controls, the built-in EQ allows me to choose the desired frequency and the amount of boost/cut as well as the width (Q factor). Traditionally, competitors would go for a 1/3 octave equalizer to maximize tuning ability. No doubt it's a good approach. But generally, only about 10-15 bands were actually being adjusted. The remainings were not being used at all. This model comes with 5 adjustable bands. Probably too little from a competitor's perspective, but they do a great job at reducing peaks/dips caused by the car's natural acoustics.
Both lowpass and highpass filters are set at 63Hz @ 24dB/oct slope. I selected this setting by trial and error. At this setting, the subwoofer blends well with the component speakers. Bass accuracy is maintained while not putting too much stress on the component speakers. Cutting at higher frequency, say 80Hz, will make the bass sounds muddy and inaccurate. Cutting it lower on the other hand, doesn't give any more improvements and will only put more stress on the component speakers. As far as EQ goes, only one band is used (50Hz, -1dB, Q=2). The remainings are all set to flat. The following are my time alignment settings:
Left
Right
Front
1.4
2.3
Rear
0.0
0.0
Subwoofer
0.0
0.0
The above settings have improved center imaging and the overall soundstage tremendously. Vocals sound much clearer and become sharply focused in the center of the soundstage. Instruments sound more realistic with a sense of "spaces" in between them. The apparent depth of the soundstage also increases. The 0.9ms delay that is applied to the right channel relative to the left helps to improve center imaging, while the other 1.4ms delay that is applied on top of that to both the left and right channels helps in achieving upfront bass. The combination of crossover and time alignment settings produce a well balanced sound with good soundstage. Sounds easy, but this is where I spent most of my tuning time. Not weeks, but months.
One important lesson that I've learned from all this is to set the crossover cutoff frequency first, before attempting to fine tune the amp gain levels. I've wasted a lot of time trying to set the gain levels and still not getting the results that I want. When the crossover is tuned properly, it will be much easier to set the amplifier's gain levels.